Low Poly Image Transformation
tl;dr
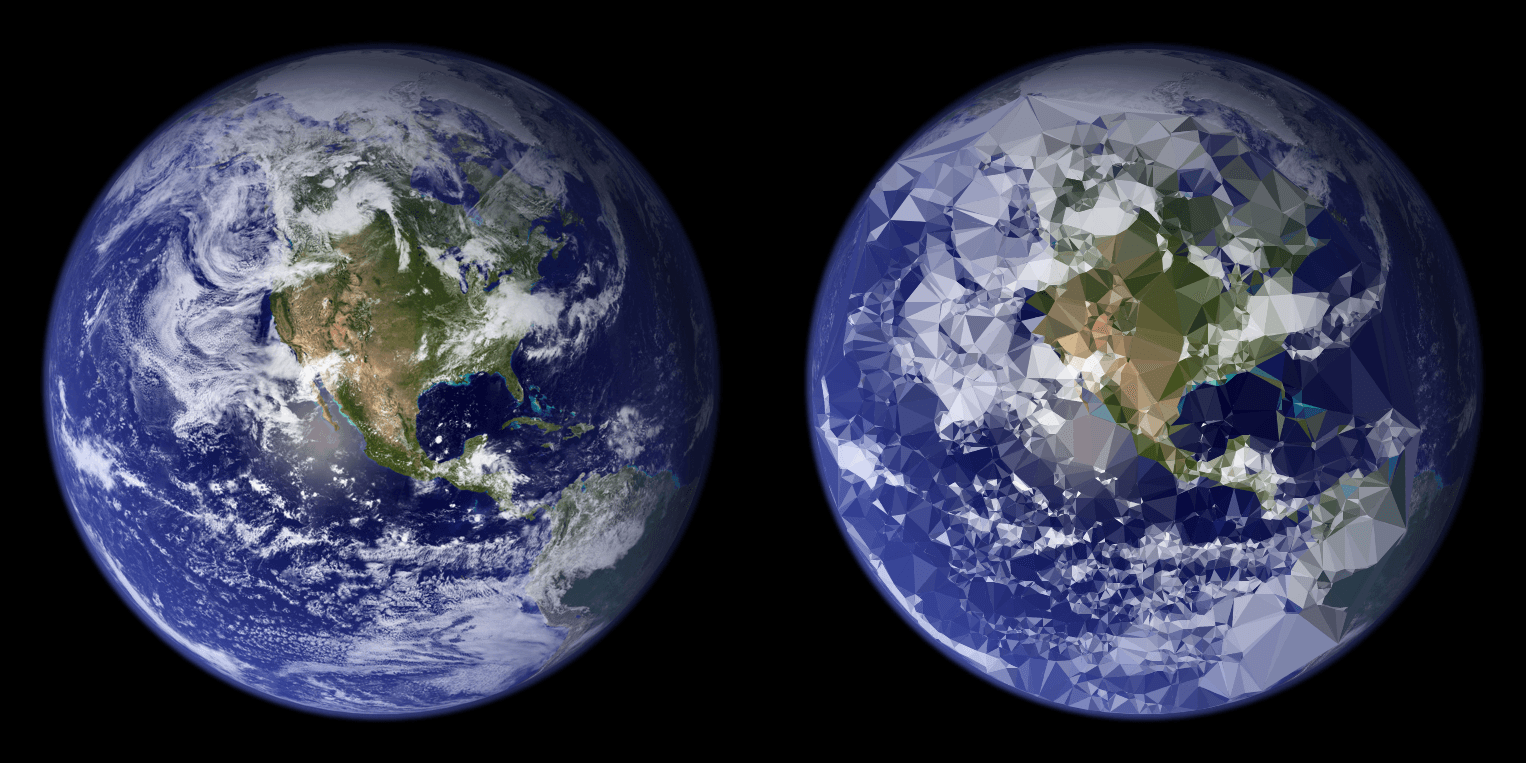
The tool transforms a normal image into a low poly/triangulated image. It does this by detecting edges and connecting different edges to form triangles. There are 3 options in the tool:
- Edge sensitivity: This slider determines how easily the tool sees something as an edge. The higher the sensitivity, the more easily something will be detected as an edge.
- Nb. Triangles: the edge sensitivity determines how many triangles we could make. This slider allows you to limit the number of triangles that are actually generated.
- Keep color: You probably want to keep this on, but if you're intrested in looking at how your image is triangulized exactly, try switching it off!
The long version
The triangulation of an image happens in two steps. First, we look for edges by finding pixels that are suspiciously brighter or darker than some other pixels around them.
Then, we have a list of points/pixels that may be part of an edge. In the second step, we pick some of these points and connect them all so they form triangles. Finally, we display the
generated low-poly mesh on top of the image.
In order to detect edges, we first convert the image to grayscale. This way, each pixel gets a value between 0 and 255 which represents it's brightness. Exactly what we need! Next, a
Sobel filter is applied to the grayscaled image. Each pixel once again gets a value between 0 and 255, but this time it represents
the likelyhood of that pixel being part of an edge (kinda). Now we select all the pixels which have a value above the treshold set by the edge sensitivity slider. These pixels are candidates
to be an edge in our mesh. If there's a lot going on in an image, we could still have a lot of candidate edges. To prevent your computer from lifting off while finding the mesh of millions of
points, we limit the number of pixels we actually use for our mesh. This number is set by the Nb. triangles slider. We Thanos-snap the excess edges and are finally ready to actually
generate the mesh.
To do this, the tool uses an algorithm known as Delaunay triangulation. Simply put, it takes in a bunch
of points, and gives us back a list of nice triangles (angles not too shallow, no intersecting triangles) that connect our points. We have our mesh! All we need to do now are some finishing touches.
First, we try to avoid large triangles as they are generally speaking not very good-looking. To do this, the tool gives you the option to select a boundary. All triangles that aren't completely
within the boundary, are removed. This allows you to only apply the low poly transformation to a part of the image and mostly filters out the large triangles.
Finally, we fill the triangles based on the color of the original image (if the Keep Color option is enabled).